Showing posts with label Polymer Clay 101. Show all posts

Monday, July 1, 2013

Polymer Clay 101: Baking your Clay Projects

Well if you are reading this I might guess you were like me and have burned a couple of your masterpieces. I know how frustrating it is to take your hardwork out of the oven and discovering that what you sculpted was not a beautiful cupcake but instead a blackened lump of clay. It sucks and I have been in the same exact situation. At one point I burned so many projects that I gave up for a good 2 or 3 months. But, I am here to tell you: Don't give up!

Temperature

First of all, the very first thing I want to warn you about is your temperature. I always cook on the low end (around 250 degrees for Sculpey and Michaels brand clay). I found that whenever I cooked the clay at the mid to high range of the packages temperature I got the most blackened lumps. So, check your packages temperatures and dial your oven to the low end. Investing in a oven thermometer is also another smart move. Most ovens will waver a little bit below or above the actual temperture so investing in an oven thermometer will help you to pinpoint a certain temperature.

Timer

Next, set a timer! I know this one seems kind of ridiculous but I am horrible about setting timers and burned a lot of clay by leaving it to bake for too long. I usually cook my pieces for about 10 minutes. With bigger pieces than miniature food I would recommend cooking the clay for a bit longer. Also, if you are cooking a masterpiece I would suggest just checking on it every couple of minutes just to make sure you don't see the starlings of a burn.

Tile Bake Tray

I recommend using a tile (you can get them for less than $5 at The Home Depot or Lowes) to place your clay projects on to bake them. I have had great success with the tile I currently have and believe that it accounts a lot for my ability to now cook my clay without burning it. I don't know the science behind using metal vs. tile or how the tile cooks better, I just know that the tile has been a huge help!

Toaster Oven

I have also found that cooking in a small toaster oven and greatly decreased the amount of clay I burned. Now, having one of these to cook clay is not necessary and unless you plan to invest a lot of time or start a business you probably do not need to spend the money to own one.

Other Tips

If you are cooking a piece that is more fragile, whether it be long, skinny pieces or an overall thin piece I would recommend dousing the clay in an ice water bath immediately after taking it out of the oven to give it more strength.


I know how frustrating cooking clay can be. And if you still don't have success after implementing my tips you could try making simple patties of clay and playing around with settings like temperature and time until you find what works for you.

If you still are having issues with cooking you clay shoot me an email or leave a comment down below and I would love to help you out! Thanks for reading my blog!

E-mail: cocoscreations123@yahoo.com


Saturday, June 29, 2013

Polymer Clay 101: Finishing Your Clay

So you have finished sculpting your clay and baked it to perfection, what next? Well now its time to put the finishing touches on your clay.

IF YOU ARE MAKING JEWELRY....(let's say an earring)
1) Finish off your headpin or superglue your eyepin into place.
2) Take an earring finding and use your pliers to open the wire at the bottom of the earring
3) Place it onto you finished off headpin/eyepin, use the pliers to push it back together.

This is just for dangle earrings in particlaur. For stud earrings I apply strong glue to the base to attach it. For necklaces attach or complete the headpin/eyepin and just put a necklace chain through.

GLAZING...
I prefer to glaze my earrings after I place the earring finding or jewelry finding on it, so I can coat the whole charm and hang it up to allow it to dry.

Coat your whole charm in a layer of glaze, being sure to apply it evenly so you don't leave bumps  because once it dries you can't fix those things. Also, try and get the whole charm coated but you can always let it dry and do touch up later on places you missed the first time around. I have been glazing for awhile now and always seem to have to do at least two coats to cover the charm entirely.

After you have finished all of the above, I ensure the headpin is secure and won't come out and that the glaze is even on the charm and then it is ready to be worn or sent as a gift!
Have fun!!!!

Have any questions? Just leave a comment down below and I would be more than happy to do my best to answer them :)

Tuesday, August 2, 2011

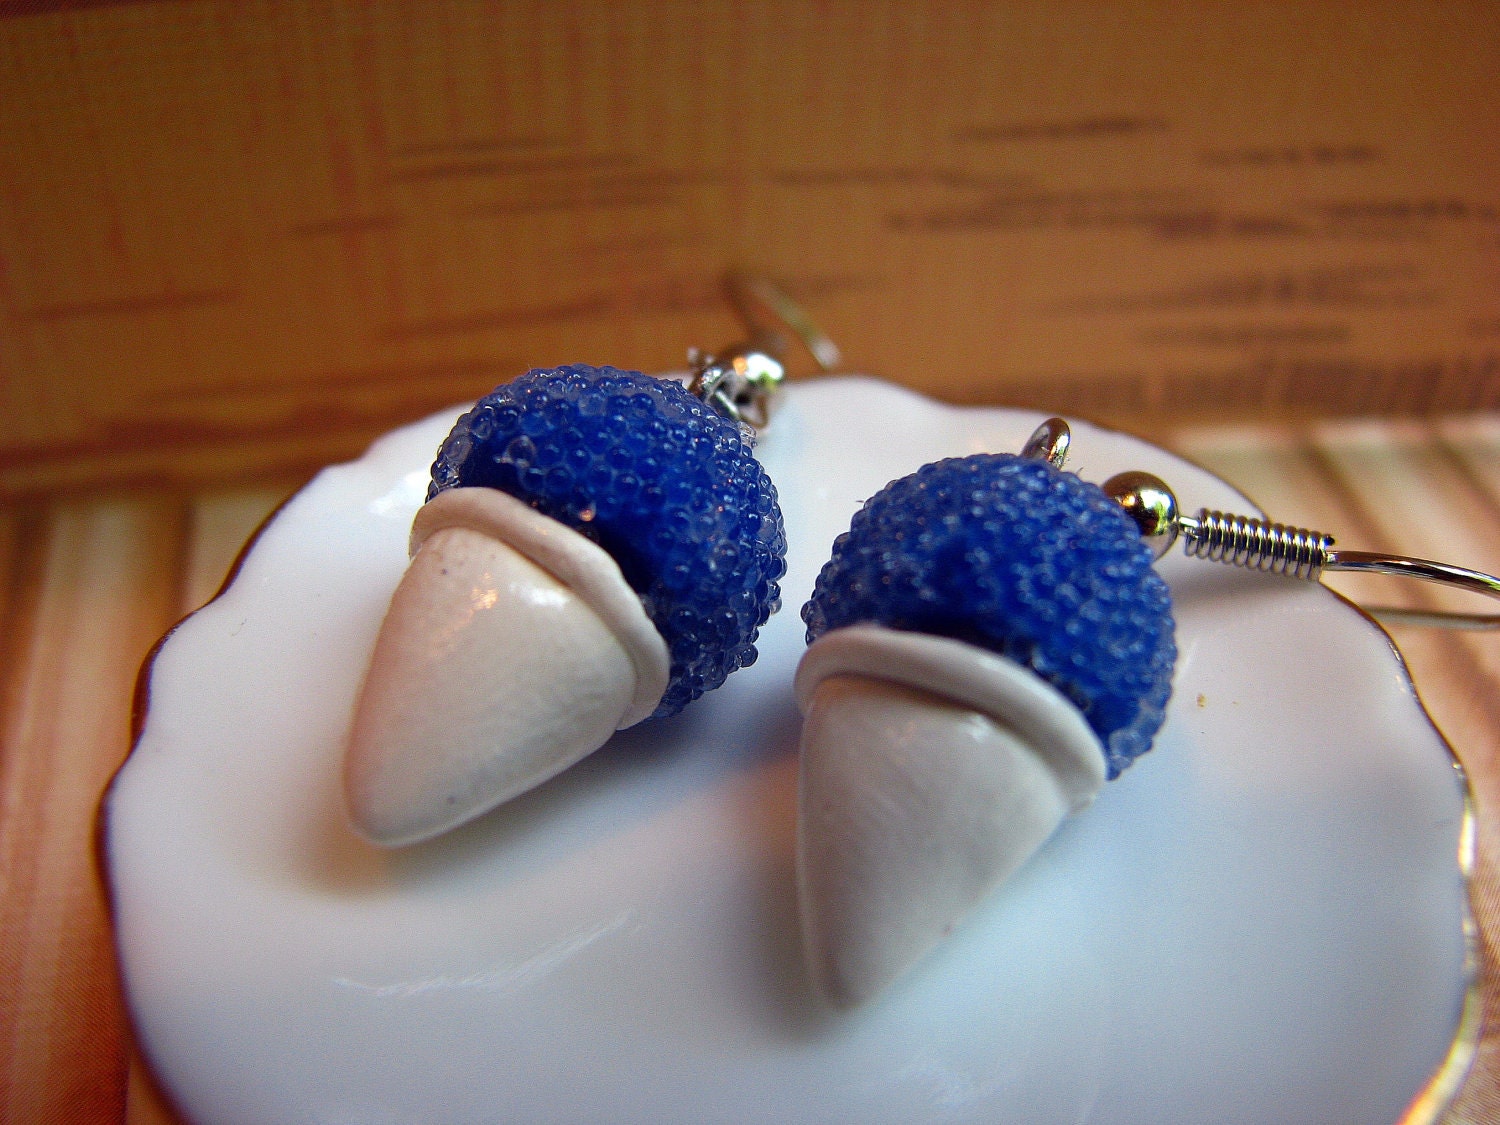
Polymer Clay 101: Red Snow Cone

The summer months are here and not letting us off easy either. Here is a tutorial for a treat that is sure to cool you down during these record-breaking temperatures: SNOW CONE!
First start with a ball of white clay.
 Work with the clay and form it until you get something like this.
 Cut off the rounded area at the top so you are left with a flat top.
 With more white clay, roll out a long thin snake.
 Wrap it around the top of your bases.
 Next take some red clay (you can use any color depending on what color you want your snow cone, even rainbow!)
 Roll out two balls and cut the bottom off so they sit flat.
 Take some TLS on a toothpick.
 First poke a hole in the top of your ball (where you will later place your eyepin) and cover the ball with TLS.
 Next take some clear mini class marbles.
 Place your balls in it and roll them around until they are covered.

Now the next few steps I didn't take pictures of because I forgot all about it but here is how you finish them off.

1) First cook the white base until it hardens.
2) Next, use a little bit of TLS on the top of the base, then place your ball on top of it with the eyepin in it.
3) Bake this until it hardens, the TLS will harden as well creating a bond between you base and ball so they will not separate.
4) Glaze and attach to earring hooks, and your done!
While these exact earrings have already sold, here is a link to similar ones but in blue:
Thanks so much for reading my blog and hope you like the tutorial. Stay cool during these hot days!

Sunday, June 5, 2011

Polymer Clay 101: Cherry Cheesecake

It's finally time for another tutorial!! This time I am going to show you how to make cherry cheesecake. Once you make the cheesecake you can make dangle earrings, studs and charms. Let's get started!

As well they are listed in my etsy shop for $7.50, check them out: http://www.etsy.com/listing/75422181/cherry-cheesecake-polymer-clay-earrings

You will need:
  • White Clay
  • Ecru Clay
  • Brown Clay
  • Red Clay
  • TLS
  • Red Chalk Pastel
  • Exacto knife
  • Sharp pointy tool
  • Wax paper
  • Eye pins
Instructions
 First take your white clay.
Form it into a ball and then squish it flat. Work with it until it is circular and even.
Take your brown and ecru clay.
Mix some ecru clay with some brown clay.
Flatten your ball of clay.
Wrap the brown clay around your filling and roll it so the clay sticks together. Use your exacto knife to cut off the excess and roll again.
Roll out the excess and place it on top of the crust and push to secure.
Slightly cut your pie into eight pieces and push eight eyepins into the middle of those pieces. Put in your freezer to help the clay cool.
Cut up your pies after allowing them to cool.
Use a sharp tool to indent the crust and texture the crust.
And a toothbrush to texture the filling.
Take your red clay and form tiny balls. Place three on each slice.
Squirt some TLS into a container and mix in red chalk pastel. Pour into onto your slices with a toothpick, and bake!
Glaze your slices and superglue your eyepins in to secure them. Attach earrings if you wish.

Thanks so much for reading my blog!!!

Wednesday, June 1, 2011

How to: Ship Outside of the US

Now most of you probably are going to get bored reading this article, but I feel as though someone should write about this topic. I just recently got some of my first orders for places not in the US and it was a confusing few days. I finally ended up just going over to my local post office and ask what I needed to ship the package. But my closest post office takes me about 15 minutes to drive through so I am going to share with you how I would suggest tackling this daunting task!

Let's get started!!

I have only shipped to Canada and Australia but I assume most places are similar.

1) Next time you are at your post-office ask them for a few custom forms (this makes it so much easier when it gets time to shipping).
2) Get your package ready:
a. print the return label or write it on your package
b. use printable address labels and print one out (don't stick it on the package yet!)
3) Fill out the customs form
4) Bring all of the following to your post office:
Package (with whatever you are shipping inside)
Return Label
Address Label
Custom Form
Credit card, money, etc.
5) Pay for shipping and give the postman your customs form. They will put it on your package and then place the address label where it is visible and not covering the customs form.
6) Make sure everything is in place and mail!!

Shipping outisde of the US seemed like a daunting task but it was so much easier than I thought it would be. Shipping prices were about $2.59 to Australia and about $1.98 to Canada. I used the most basic methods of shipping. 

Hopefully this at least helped everyone a little bit!!

Thanks for reading my blog!!!!

Thursday, April 21, 2011

Polymer Clay 101: Frosted Sugar Cookie

I am so excited to present my first full tutorial with pictures! I have tried a couple of times to take pictures while I was making a project, but I got all wrapped up in the project I ended up not taking pictures. But, finally, my first full tutorial on making frosted sugar cookies with sprinkles:
Start with well-conditioned ecru clay.
 Flatten the clay into a cookie shape, try pressing around the outside to give it more of a cookie look.
 Stick a eyepin in and use a toothbrush to add texture all over your clay.
 Next, condition some pink clay and flatten it.
 Place it onto your textured cookie.
 Take some TLS (transcluent liquid sculpey) and squirt a tiny dot of it onto the pink clay.
Use a toothpick to spread it all over the pink.
 Use tiny glass marble beads for the sprinkles, which you can find in the scrap booking section of Michaels.
 Sprinkle the beads onto your cookie until you like what it looks like. Get rid of the beads that fell below your clay and stuck.
Bake and then if you wish to, glaze them, and your done!!

As well, these cookies are listed in my etsy shop for $7.00, please check them out:
http://www.etsy.com/listing/72629387/pink-frosted-sugar-cookies-with

Thanks so much for checking out my blog!!

LinkWithin

Related Posts Plugin for WordPress, Blogger...